
In today’s technology-driven world, mastering the installation of an operating system on a desktop PC is essential for anyone looking to optimize their computing experience. Whether you’re setting up a new computer, upgrading an outdated system, or resolving software problems, this step-by-step guide provides clear instructions and essential tips to help you through the installation process. From preparing your hardware and choosing the right OS to completing the installation and configuring settings, you’ll gain the confidence and skills needed to successfully install an operating system with ease.


Step 1: Gather Necessary Tools
Gather all necessary tools before starting the installation. Ensure you have a USB flash drive with a minimum capacity of 8GB. Use a computer with internet access to download the OS installation media from the official website of the operating system you plan to install. Confirm that all items are ready and accessible for a smooth installation process.


Step 2: Create Installation Media
- Download Rufus or the Windows Media Creation Tool from their official websites.
- Insert a USB drive into your computer that you want to use for the installation media.
- Open the tool you chose and locate the option to select your downloaded OS image file.
- Choose the correct USB drive from the list within the tool to avoid data loss on the wrong drive.
- Follow the prompts provided by the tool to format the USB drive and make it bootable.
- Wait for the process to complete, ensuring that you have a successfully created bootable USB drive for installation.
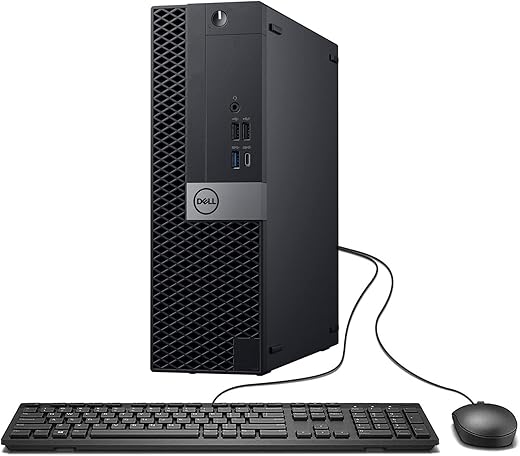
Step 3: Connect Peripheral Devices
Ensure the desktop PC is powered off completely. Connect the monitor to the appropriate video port on the back of the computer, securing it tightly. Plug the keyboard into a USB port, making sure it fits snugly, and do the same for the mouse. If you have additional peripheral devices, such as printers or external drives, connect them now, ensuring each device is properly attached.
Step 4: Access BIOS/UEFI
Press the power button to turn on your PC, and immediately start tapping the designated key, which is often F2, F10, DEL, or ESC, to access the BIOS/UEFI setup. Watch for the manufacturer’s logo as it appears on the screen; this is a good indication to continue pressing the key. Once you enter the BIOS/UEFI interface, navigate through the menu using your keyboard to locate various system settings, including the boot order and hardware configurations. Adjust the settings as needed, ensuring to save any changes before exiting the setup.
Step 5: Set Boot Order
- Access the BIOS/UEFI setup by pressing the designated key during startup (commonly F2, DEL, or ESC).
- Navigate to the boot menu using the arrow keys.
- Select the USB drive from the list of boot devices and move it to the top position to set it as the primary boot device.
- Save the changes by following the on-screen prompts, typically by pressing F10.
- Exit the setup, and your PC will restart, booting from the USB drive.
Step 6: Start Installation
Boot from the USB drive and wait for the installation screen to appear. Select your preferred language from the dropdown menu. Adjust the time zone settings according to your location. Choose your keyboard layout from the available options to ensure proper input. Follow the on-screen prompts to proceed with the installation.
Step 7: Partition the Hard Drive
Select the option to manage your hard drive partitions during the installation process. Review the existing partitions and choose one for the operating system installation or create a new partition if necessary. Format the new partition to ensure it is compatible with the OS. Back up any important data from the selected partitions before making changes to prevent data loss.
Step 8: Complete the Installation
Follow the remaining prompts displayed on your screen to finish the installation. Enter your product key when prompted, ensuring it’s correct to activate your software. Select your preferred privacy settings by reviewing the options available and adjusting them according to your comfort level. Create user accounts as needed, providing usernames and passwords for each account. Expect the computer to restart several times during this process, allowing necessary configurations to take place.
Step 9: Install Drivers and Updates
Install the necessary drivers for your hardware components, starting with your graphics card, motherboard, and network adapters. Visit the manufacturer’s website for each component and download the latest driver versions. Check for system updates by accessing the settings menu of your operating system and selecting the update option. Apply all available updates to ensure that your operating system is current and secure.
Final Steps and Tips
In conclusion, installing an operating system on a desktop PC is a straightforward process that empowers you to customize your computing experience. Whether you’re setting up a new machine, upgrading, or resolving issues, the steps outlined in this guide will help ensure a smooth installation. With your new OS in place, you can now enjoy improved performance and access to the latest features. Happy computing!
Essential Equipment Needed


Essential Installation Insights
Step-by-Step Guide to Optimizing Your Desktop PC Experience
- Familiarize Yourself with the Interface: Start by getting to know the desktop environment, including the taskbar, start menu, and icons. Spend some time clicking around to see what each function does
- Learn Basic Navigation: Practice using the mouse and keyboard. This includes opening applications, switching between windows, and using shortcuts like Ctrl+C for copy and Ctrl+V for paste
- Explore File Management: Understand how to create, save, and organize files and folders. Learn how to navigate through File Explorer to find your documents, pictures, and other media
- Install and Update Software: Learn how to download and install programs from the internet. Make sure to check for updates regularly to keep your software running smoothly and securely
- Practice Safe Browsing Habits: Be aware of online safety. Use antivirus software and avoid clicking on suspicious links or downloading unknown files to protect your PC from malware


Hey, awesome guide! Just wanted to know what you recommend for installation media? Like, is a USB flash drive better than a DVD these days?
Thanks for your question! A USB flash drive is definitely more convenient and faster than a DVD for most installations. Plus, you can easily reuse the drive later. I’d suggest using at least an 8GB USB stick for most operating systems.
Quick question: Do I need to format the USB drive before creating the installation media? Or does the tool take care of that?
Good question! Most installation media creation tools will format the USB drive for you, but it’s a good idea to back up any important data on it just in case.
For anyone struggling with driver installation, I found using Driver Booster really helped me out! It scans for outdated drivers and installs them automatically. Super convenient!
Great tip! Keeping drivers updated is super important for system performance. Thanks for sharing your experience with Driver Booster!
I disagree with the idea of partitioning the hard drive. I think it complicates things for beginners. Anyone else feel that way?
That’s a valid point! Partitioning can definitely be confusing for newcomers. However, it can also help with organization and managing files better. Maybe you can give it a try and see how it goes!
When I installed Windows 11, I had a tough time with the BIOS settings. I couldn’t find the secure boot option! Eventually, I found it, but it took forever. Anyone else had that issue?
Oh yes, BIOS can sometimes be tricky! The secure boot option can be hidden under different menus depending on your motherboard. If you ever face it again, try checking the ‘Boot’ or ‘Security’ tabs. Hope that helps!